• A french drain helps move water away from wet spots before it can damage your yard, walkway, or foundation.
• Installing one starts with finding the problem area, planning the slope, and using gravel, fabric, and pipe to guide water away.
• Common mistakes like poor placement, no slope, and skipped testing can reduce drainage performance and lead to the same water problems returning.
Why a French Drain Matters in Fall
When water starts collecting near your home, small drainage issues can turn into bigger problems fast. In Laguna Hills, fall showers can expose weak spots around yards, foundations, and low areas that hold water too long. A french drain can help redirect that water before it causes damage you do not want to deal with later.
Ignoring drainage trouble often leads to soggy soil, standing water, and stress around the home. Those signs may seem minor at first, but they can quickly affect walkways, landscaping, and parts of the property that should stay dry. If your yard already has drainage trouble, our drainage and water damage services can help you address the issue before it grows.
The sooner you act, the easier it is to protect your home from repeated water buildup. A drain system works best when it is planned around where water naturally moves and where it tends to pool. That is why fall is a smart time to look closely at your property and make a plan that fits the season.
How a French Drain Helps Your Yard
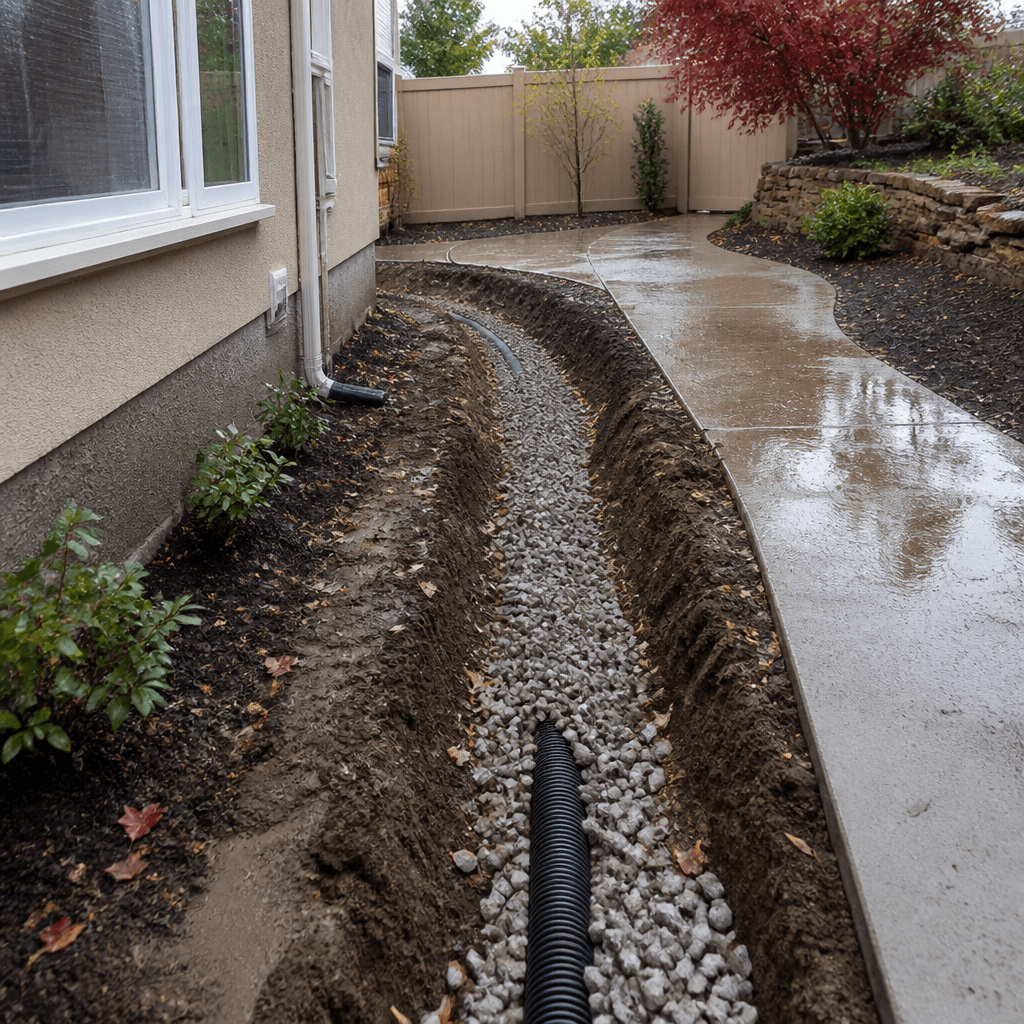
A french drain is built to catch excess water and guide it away from problem areas. It usually uses a sloped trench, gravel, and a perforated pipe to move water toward a safer exit point. This helps reduce pooling near lawns, patios, walkways, and foundation edges.
The key is making sure the system matches your yard’s layout and drainage needs. A drain that is placed in the wrong spot may not solve the problem, and water can keep returning after each rain. That is why it helps to understand how water flows across your property before any work begins.
Once the drain is in place, it should send water away from the areas where it can do the most harm. That simple change can make a big difference during wetter months in Laguna Hills. It also gives your yard a better chance to dry out faster after each storm.
Step-by-Step Guide to Installing a French Drain
🧭 Step 1: Find the Water Problem
Look for spots where water collects after rain or where soil stays wet longer than the rest of the yard. Mark those areas so you can plan the drain around the real trouble points. This helps you place the system where it can do the most good.
📏 Step 2: Plan the Drain Route
Choose a path that carries water away from the problem area and toward a safe outlet. The trench needs a steady slope so gravity can help move the water. Without the right route, the drain may not work as intended.
🪓 Step 3: Dig the Trench
Dig a trench along the planned route with enough depth and width for the drain materials. Keep the bottom sloped so water can flow in the right direction. A level or reversed trench can slow drainage and cause new pooling.
🧵 Step 4: Add Filter Fabric
Line the trench with filter fabric before adding gravel or pipe. This helps keep soil from washing into the drain and blocking it later. It is an important step because clogged material can reduce flow over time.
🪨 Step 5: Place Gravel and Pipe
Add a layer of gravel, then set the perforated pipe in place with the holes facing the right direction for drainage. Cover the pipe with more gravel so water can move through the system more easily. This setup creates the open space needed for water to travel through the drain.
🛠️ Step 6: Cover and Finish the Surface
Wrap the fabric over the gravel if needed, then cover the trench with soil or another finishing layer. Make sure the surface blends with the yard and still supports water movement. The goal is to keep the system working while restoring the area above it.
🚿 Step 7: Test the Flow
Run water through the area or wait for the next rain to see how the drain performs. Check for standing water, slow drainage, or spots where water still collects. Testing helps confirm that the slope and placement are doing their job.
🧰 Step 8: Inspect After Heavy Rain
Check the system again after a larger storm to make sure it is still moving water as expected. Look for settling soil, clogs, or overflow near the outlet. A quick check after wet weather can help you catch small issues early.
Mistakes People Make With Drain Installation
Many DIY drainage projects fail because one small step is rushed or skipped. Water does not forgive bad slope, poor placement, or blocked materials, so careful work matters from the start. These mistakes often lead to the same problem coming back again and again.
Knowing what can go wrong helps you avoid wasted time and extra repairs. Most of the issues below happen when people try to save time or guess at the setup. A little planning can prevent a lot of frustration.
⚠️ Mistake 1: Choosing the Wrong Location
This happens when the drain is placed where water is visible instead of where it is collecting and traveling from. People often do this because the wet spot is easy to see, but the real source may be uphill or nearby. To prevent this, trace where the water comes from before digging.
⚠️ Mistake 2: Leaving Out the Slope
A drain that does not slope correctly will not move water away as it should. This often happens when the trench is dug by eye instead of measured carefully. Use a clear slope plan so gravity can do the work.
⚠️ Mistake 3: Skipping Filter Fabric
Without fabric, soil can move into the gravel and clog the system. Many people leave it out because it seems optional, but it helps protect the drain over time. Prevent this by lining the trench before adding the gravel and pipe.
⚠️ Mistake 4: Using Too Little Gravel
A shallow gravel layer can slow water flow and leave the pipe less effective. This usually happens when someone tries to cut material costs or fill the trench too fast. Make sure the gravel bed gives the drain enough room to work properly.
⚠️ Mistake 5: Not Testing the Drain
Some people finish the job and assume it works without checking flow. That mistake happens because the drain looks complete on the surface, even if water still pools below. Always test the system so you can catch drainage issues early.
Frequently Asked Questions
What is a french drain used for?
Yes, a french drain is used to move excess water away from areas where it collects. It helps reduce pooling near yards, foundations, and other low spots that stay wet too long. The system works by giving water a clear path to drain away.
How deep should a french drain be?
Yes, the depth depends on the problem area and the way water moves across the property. In many cases, the trench needs to be deep enough to collect water and keep a steady slope. The right depth matters because a shallow drain may not solve the issue.
Does a french drain work in heavy rain?
Yes, a french drain can help during heavy rain by redirecting water before it builds up. It works best when the trench has the right slope and the outlet can carry water away safely. If the system is poorly built, it may not keep up during bigger storms.
How do I know if I need a french drain?
Yes, you may need a french drain if water keeps pooling in the same place after rain. Signs include soggy soil, standing water, and damp areas near the home that do not dry quickly. Those are strong clues that your yard needs better drainage.
Can a french drain prevent yard flooding?
Yes, a french drain can help prevent yard flooding by moving water away from trouble spots. It is a smart fix for areas where rainwater keeps collecting and has nowhere to go. The system works best when it is planned around your yard’s natural water flow.
Final Thoughts on Better Yard Drainage
A well-planned french drain can make a big difference when water keeps collecting in the wrong places. In Laguna Hills, fall weather is a good reminder to look at drainage before repeated rain creates bigger problems. By following the right steps, you can help protect your yard and reduce stress around your home.
The best results come from careful planning, proper materials, and a system that fits the way your property drains. When you take action early, you can avoid larger issues later and keep your outdoor space working the way it should. For more updates and helpful home care tips, follow us on social media.